Quick Start Guide
Get up and running with Stacker in under 5 minutes. You'll create an app inside your workspace, then use AI chat threads to shape customer portals and worker agents — all in the same place.
At a glance: A workspace is your team's home in Stacker. Inside it you build apps — each app holds your data, one or more customer portals, and the AI agents that work on your behalf. Most of the building happens in threads: conversations with an AI chatbot in the left sidebar. Describe what you want; the agent creates tables, pages, and agent configs, then you iterate until it feels right.
Before you begin
You'll need a Stacker account to follow this guide. If you don't have one yet, you can sign up for free.
Create an account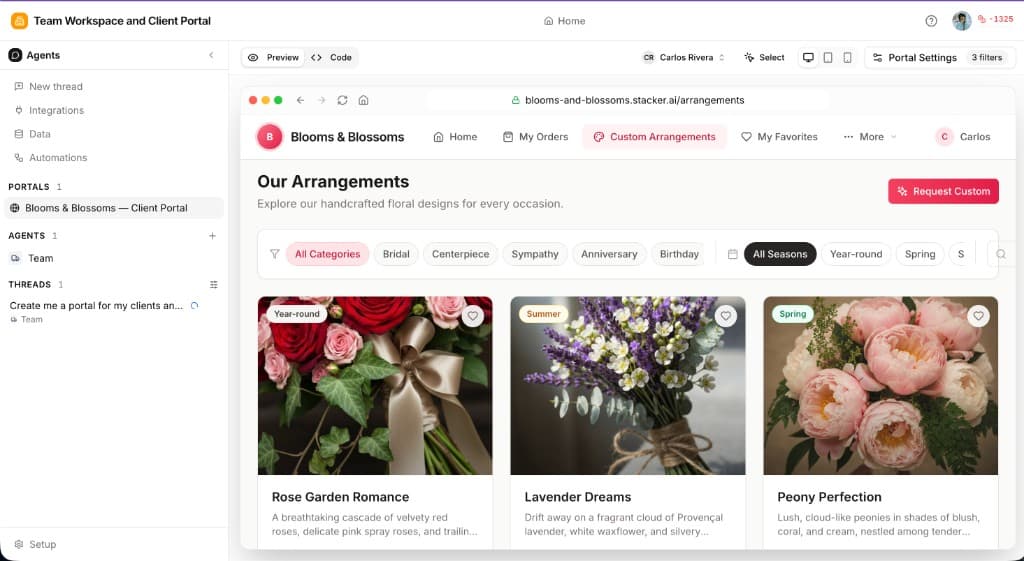
Build with AI chat
Create an app in your workspace
Sign in and open your workspace. From the Stacker homepage, describe what you want to build in the prompt box — for example, a client portal with an agent that triages support requests. Click Build my app to spin up a new app with tables, permissions, and a starting portal.
Start a thread and describe your goal
Inside the app, open the left sidebar and click New thread under Threads (or pick an existing conversation). Tell the AI what you need in plain language — layout changes for the portal, a new worker agent, data fields, or all of the above. Each thread keeps its own history so you can explore ideas in parallel.
Shape portals and agents through conversation
Portals are always available in the sidebar. In agentic apps, newly created portals are also added to the app navigation. Those navigation links are editable, so you can rename, reorder, group, or remove them alongside your app pages. Either entry opens the live preview. In agent threads, configure what each agent handles, which tools it can use, and how people reach it.
Invite users and go live
When the portal and agents look right, add portal users via Data in the agents sidebar with their email, then copy the Login URL from Portal Settings → Users. Portal users sign in with a magic link or one-time code. Your team stays in the workspace; external users only see the published portal and agent experiences you configured.
Two kinds of AI chat
Both use the same thread model — you message, the AI replies and takes action — but they serve different roles:
Portal builder threads
You talk to the builder agent to design customer-facing portals — pages, forms, views, and branding. Changes show up in the preview as the conversation progresses.
Worker agent threads
You configure agents that do work for your end users — answering questions, updating records, sending follow-ups, and running on schedules. Test them by chatting in the Agents pane.
Example prompts
Not sure what to ask? Try one of these in a new thread — mix portal and agent goals as needed:
Client portal + support agent
Build a client portal where customers can view project status and upload files. Add an agent that answers common questions and creates a task when someone asks for help.Vendor workspace with ops agent
Create a vendor management portal with invoice tracking and contract views. Set up an agent that chases overdue invoices and sends a weekly summary to my team.Partner deal registration
A deal registration portal where channel partners submit deals and track approval status. Add an agent that validates submissions and notifies partners when status changes.